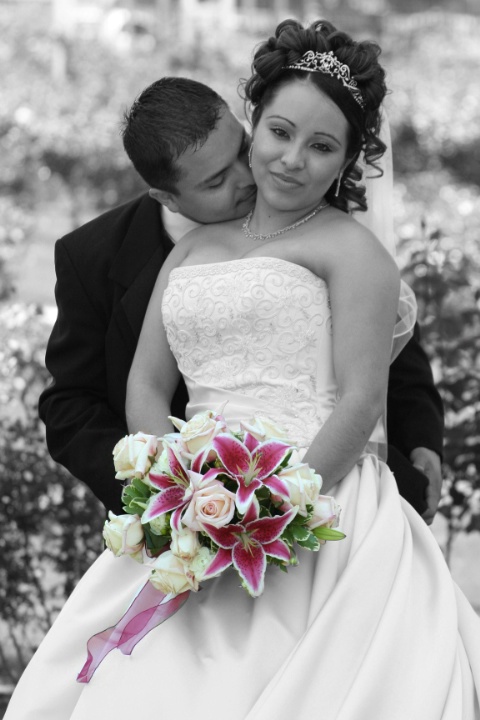
Love is in the Air

Uploaded: August 09, 2005
Hand Colored in Photoshop Elements 3.0.
Tina Edwards August 11, 2005
I know you said you hand-colored in Photoshop Elements 3.0 but I was wondering how exactly you did it. I also have PSE 3.0 and just can't figure out how to hand-color in it. It looks great, I love it.Cyndee Wanyonyi August 11, 2005
Hi Tina :). I am so glad you like the picture. It's so easy!1. Open the first photo you want to hand-color.
2. Outline the part you want to remain in color, using either the lasso or magic wand.
3. Ctrl J (for PC) or Apple J (for MAC) to add a layer with just the part that you outlined.
4. Go back to the original photo and "remove color" (under "Enhance Photo").
5. VOILA! You have a hand-colored portrait.
I have learned everything I know about Adobe Photoshop Elements 3.0 from Scott Kelby's "The Photoshop Elements 3 Book for Digital Photographers". It is a great tool for your e-library.
P.S. If you decide to save it as a totally different file (I recommend that so you still have the original to play around with), either flatten the image or Merge Visible Layers (CTRL/Apple E) and save. Enjoy :). #1707904
Tina Edwards August 11, 2005
Thank you, Cinthia, I will have to give it a try! Where can I get one of those books from Scott Kelby "The Photoshop Elements 3 Book for Digital Photographers" #1708006Cyndee Wanyonyi August 12, 2005
Hi Tina. I got mine on Amazon.com for about $24. If you get it in a regular bookstore, you'll expect to pay about $45. Worth every penny either way you go. #1710080Cyndee Wanyonyi August 18, 2005
Thanks. I'll try that next time :). #1731246Sign up for an interactive online photography course to get critiques on your photos.
Discussions by Category: You can view photo discussions on various themes in the Community > Photo Discussions section of the site.
BetterPhoto Websites: If you see an orange website link directly under the photographer's name, it's totally okay. It's not spam. The reason: BetterPhoto is the one that offers these personal photography websites. We are supporting our clients with those links.
Unavailable EXIF: If there is no other information but 'Unavailable' in the EXIF (meaning no EXIF data exists with the photo), the 'Unavailable' blurb is not displayed. If there is any info, it shows. Many photos have the EXIF stripped out when people modify the image and resave it, before uploading.
The following truth is one of the core philosophies of BetterPhoto:
I hear, I forget.
I see, I remember.
I do, I understand.
You learn by doing. Take your next online photography class.
Copyright for this photo belongs solely to Cyndee Wanyonyi.
Images may not be copied, downloaded, or used in any way without the expressed, written permission of the photographer.
Log in to follow or message this photographer or report this photo.

I already have an account!
