To discuss a photo, sign up as a BetterPhoto member or log in.
|
|
|
The Artist
|
|

|
The Artist
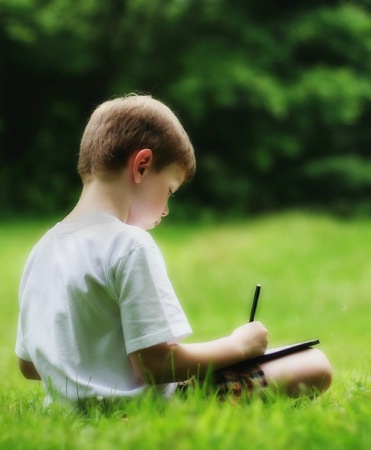
1/250, f2.8, 50mm 1.4 lens, overcast afternoon.
Applied Midnight Sepia (adjusted to tone down effect)
For those like me with PS Elements (ie no actions!) I've included instructions on how to achieve the Midnight Sepia effect in the discussion below.
Since I mentioned it in my "Patchwork" photo, several have asked how to do selective burning using masks for blown out areas, I've described that in the Discussion too. This is useful for Midnight Sepia as it tends to blow out highlights due to the Screen layer
Jane M |
|
|
|
|
|
|
Jane M |
|
Midnight Sepia Action for those without Actions :
Duplicate background layer, click on new layer
Apply Gaussian Blur (Radius: 20 pixels)
Apply Hue/Saturation (Hue: 45, Saturation: 25, Lightness: 0)
Set current layer mode to "Multiply" (from drop down menu at top)
Flatten Image
Duplicate background layer, click on new layer
Set current layer mode to "Screen" (from drop down menu at top)
Flatten Image
Duplicate background layer, click on new layer
Set current layer mode to "Screen" (from drop down menu at top)
Set current layer opacity to 0% (from drop down menu at top)
Adjust the opacity of the top layer to control lightness.
June 26, 2006
|
|
|
Jane M |
|
|
|
|
|
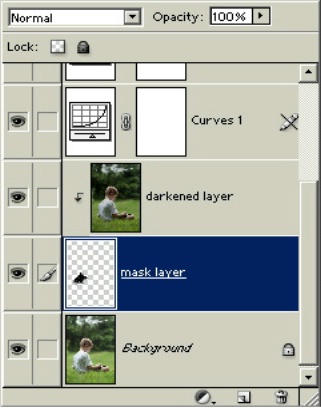
Layers Tab
Jane M |
|
|
|
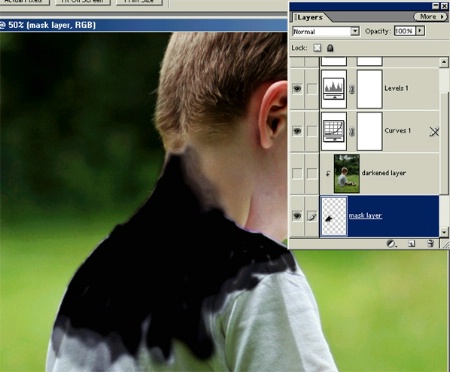
Masking
Jane M |
|
|
|
PS Elements Layers and selective burning :
1) Duplicate background layer naming it "darkend layer" and click on that layer in the layers tab
Adjust brightness so that burned out areas are now ok (the rest will be too dark)
2) Click on the 'new layer' icon at the bottom of the layers tab, renaming layer "mask layer"
3) Click on the new transparent (checkerboard) "mask layer" and drag it below "darkened layer" layer
4) Click on "darkened layer" layer and type ctrl-G (control & G at same time)
This groups the copied image layer with the transparent masking layer
5) Click 'eyeball' on "darkend layer" layer to make invisible
Hit "D" key to make painting colors go to default (black foreground)
6) Click on "mask layer", paint black in varying degrees of opacity in the blown out areas where you wish the darkened area to show through. See photo for example of masking using this method.
7) Click 'eyeball' on "darkened layer" to see final effect, the layers tab should now look as shown in example
photo
June 26, 2006
|
|
|
|
Log in or sign up to respond or interact.
|
