To discuss a photo, sign up as a BetterPhoto member or log in.
|
|
|
The Girl that now wears Red
|
|

|
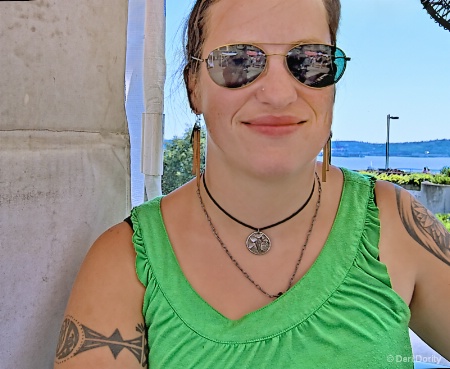
Staying Cool in Seattle
Deri C. Dority
|
|
|
|
The Girl that now wears Red
I was having a bit of fun and experimenting with the masking qualities of Nik's Color Efex Pro.
If you look at the top in the middle of Color Efex's dialog box, you will see something called "Mode". Click on the drop down and highlight "Effect Overlay" Where the red is on your image is where the effect will be applied.
First go to the B&W converter. Move the filter color slider up until the shirt is white. Now you are going to apply your mask. Put positive control points on the shirt (where you want the B&W to stay) and put negative control points on the rest of the image. The whole process takes only a few minutes. When done, just the shirt should be in B&W. Note: the infrared filter will also remove the color from the shirt.
For the next step, go to Viveza, place a control point on the shirt. Make sure the details box is expanded. You will see an eye dropper with a color box next to it. Click in the color box and choose the red color of you
Deri C. Dority
|
|
|
|
|
|
|
Deri C. Dority |
|
I was having a bit of fun and experimenting with the masking qualities of Nik's Color Efex Pro.
If you look at the top in the middle of Color Efex's dialog box, you will see something called "Mode". Click on the drop down and highlight "Effect Overlay" Where the red is on your image is where the effect will be applied.
First go to the B&W converter. Move the filter color slider up until the shirt is white. Now you are going to apply your mask. Put positive control points on the shirt (where you want the B&W to stay) and put negative control points on the rest of the image. The whole process takes only a few minutes. When done, just the shirt should be in B&W. Note: the infrared filter will also remove the color from the shirt.
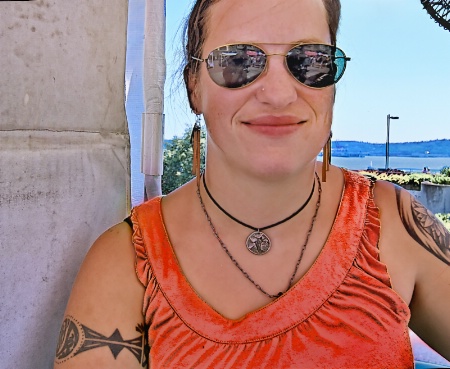
For the next step, go to Viveza, place a control point on the shirt. Make sure the details box is expanded. You will see an eye dropper with a color box next to it. Click in the color box and choose the red color of your choice. The shirt should turn red where the control point is. Next duplicate this control point and place the duplicated ones across the shirt until it is red. You may have to size the control points accordingly.
If you have red spill over on to other parts of the picture, use a negative control point on the spill over area and size it accordingly.
When done, you can do a quick touch up in Photoshop with a brush set to the same red color. The whole process with Viveza took around 7 minutes.
This demonstrates an alternative masking technique to layers in Photoshop.
August 05, 2009
|
|
|
|
Log in or sign up to respond or interact.
|
