|
Angie M. Nemanic |
STROBE LIGHTING....HELP!
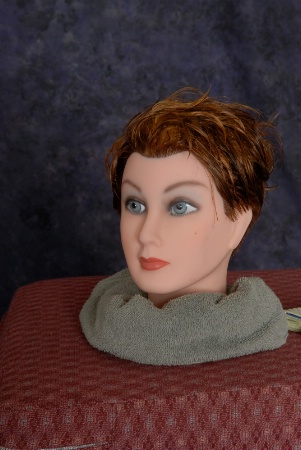
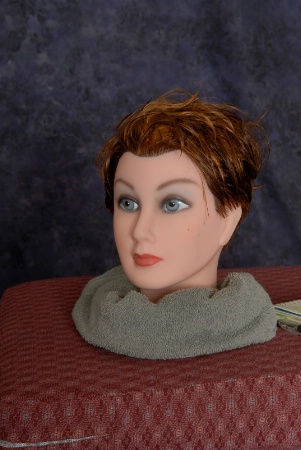
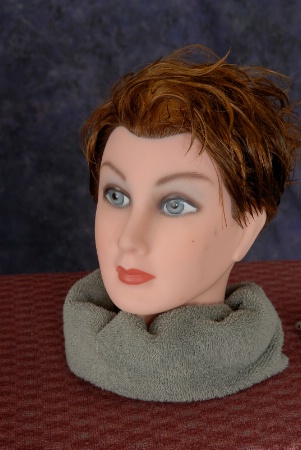
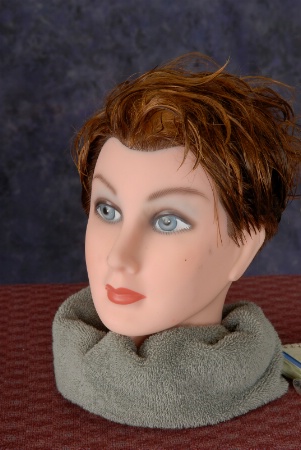
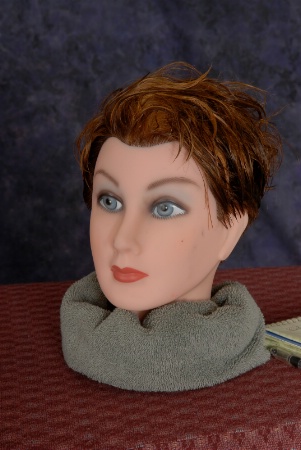
Okay, here is my gear two calumet 750s with two umbrellas. Nikon D100, lens 17 - 55 (other one stolen, replacement on the way). I'm shooting with a backdrop. My set up is in my living room which has white walls and ceiling. Camea setting is F11, ISO 100, SS 125 My main light is back by the camera and my fill is at a 45 degree angle to the subject. Any comments would be appreciated as to what I am doing wrong would be great! Thank you!!
|
||||||||||||||||||||||
|
|
|||||||||||||||||||||||
|
Alan N. Marcus |
Hi Angie< Lighting ratios are easy! The magic number is 1.4 this is the square root of 2. If you use it as a multiplying factor, the math will yield a revised lamp-to-subject distance that reduces the intensity at the subject by 1/f stop (50% reduction or a halving of the power). Control of the “Main” to “Fill” ratio is what we are talking about. You can also use a light meter. Ratio changes are achieved by controlling the intensity of the “Fill” vs. the “Main” in increments of 1 f/stop. Bellow assumes both “Main” and “Fill” are identical as to power and design. We will use “Fill” subject-to-lamp distance as the controlling factor. Using one lamp, the “Main” results in deep dark shadows on the subject’s face. Shadows are in locations that the “Main” neglected to reach like dimples and next to the nose and on the side of the face opposite the “Main”. The shadows are void of detail because they are under-exposed. The overall look is too much contrast. The countermeasure is to fill the shadows using a second lamp called the “Fill”. The consensus of opinion - “Portraits are best if you can preserve the illusion that the subject was illumined by just one lamp”. Therefore the “Fill” is adjusted so its light arrives at the subject subordinate to the “Main”. Keep in mind you are filling shadows cast by the “Main” from the cameras viewpoint. Thus the “Fill” lamp is placed at lens height as close to an imaginary line drawn between camera and subject, as possible. If the fill is placed too far away from this imaginary line the illusion on the one lamp will be ruined. Look on the web or at the museum and study great paintings and portraits, the one lamp illusion prevails as it wins most of the prizes. After placing the “Fill” at lens height near the imaginary line, your next task is controlling its intensity to keep it subordinate to the “Main”. Start with both “Main” and “Fill” set to the same power and both set to the same lamp-to-subject distance, take you first shot. The ratio will be 2:1. This will be flat lighting with little contrast. Let’s say both were placed 4 feet from subject. Next we want to try a 3:1 ratio. This is called the “Bread & Butter” ratio because it sells well and gets the most blue ribbons. “Main is retained at 4 feet. Multiply “Main” distance by 1.4. This magic number (1.4) by multiplication calculates a revised “Fill” distance. Thus 4 x 1.4 = 5.6 (round to 5 ½). The “Main at 4 feet the “Fill at 5 ½ feet furnishes the 3:1 ratio. Next we go for 5:1 ratio. This is contrasty, same would say masculine. “Main” remains at 4 feet. “Fill” placement will be 5.6 x 1.4 = 8 (we always round). Next we go for 9:1 ratio. This is very contrasty, some say theoretical. “Main” at 4 feet “Fill” at 8 x 1.4 = 11 feet. This is the highest possible practical ratio. Try using this method; it will shorten your learning curve. alanmaxinemarcus@att.net
|
||||||||||||||||||||||
|
|
|||||||||||||||||||||||
|
Alan N. Marcus |
It's me again, By the way, your examples to not appear to be shot as you have stated. Likely you’re measuring method needs some pointers. When measuring with a meter, the “Main” intensity, you must turn the “Fill” off. Next you position the“Fill” and/or adjusts “Fill” intensity and meter its light with “Main” off. Both same f/number = 2:1 Why these ratios? Say the main delivers 1000 watts. The frontal areas of the face receive. The shadows are not illuminated. You place an equal light at lens height near the lens. It also delivers 1000 watts. Now the frontal area gets light from both so frontal area receives 2000 watts. Shadows only receive 1000 watts. Ratio is 2000:1000 reduces to 2:1 Now “Fill” is set to ½ power. “Fill delivers 500 watts. “Main” unchanged deliverers 1000 watts. Frontal areas get both, therefore frontal areas receive 1500 watts. Shadows get 500 watts. Ratio is 1500:500 = 3:1 (this ratio is handled like a fraction we can reduce it. Now “Fill” is set to 1/4 power. “Fill delivers 250 watts. “Main” unchanged deliverers 1000 watts. Frontal areas get both; therefore frontal areas receive 1250 watts. Shadows get 250 watts. Ratio is 1250:250 = 5:1 Nobody said the gobbledygook is easy! Alan Marcus
|
||||||||||||||||||||||
|
|
|||||||||||||||||||||||
- Dennis Flanagan Contact Dennis Flanagan Dennis Flanagan's Gallery |
Another tip to add to Alan's info. It appears your fill is to the camera left and the main behind you. Switch them so the fill is behind you.
|
||||||||||||||||||||||
|
|
|||||||||||||||||||||||
|
John H. Siskin |
Hi Angie, Look, I know everyone wants to blame the math and position, but that’s not the reason your stuff look the way it does. You are using large umbrellas or soft boxes reasonably close to the subject. This makes flat light. Lighting ratios were developed when people used hard light, small light sources in reflectors or spots. They did this because they didn’t have enough light. One of the characteristics of ratio light is a fast transition between bright and dim side of the face you can’t get this with a big light source. Two things: I like big light sources, & I use them a lot. Second, before you tell me I’m wrong take the light modifier off your lights and test this. You will get the real ratio light, or Rembrandt light or whatever that you are supposed to get. Check out this article: www.siskinphoto.com/magazine/zpdf/hard-softlight.pdf Thanks, John Siskin
|
||||||||||||||||||||||
|
|
|||||||||||||||||||||||
|
This old forum is now archived. Use improved Forum here
Report this Thread |
|||||||||||||||||||||||