|
BetterPhoto Member |
Panoramic Photos I have a SLR (Canon Rebel). What is the best way to take Panoramic Style photos?
|
||||||||||
|
|
|||||||||||
|
Elaine S. Robbins |
If you mean panoramic like some 35mm cameras take on a single frame, then, it doesn't really matter - all those cameras do is mask off the top and bottom of the frame. You can get the same effect taking a regular photo and then chopping strips off the top and bottom of an enlarged (maybe 5x7) print. Or you can shoot 5-10 pics moving along the horizon and then paste the images together in Photoshop or w/tape and trim it so the top and bottom are straight. Beyond that, I suppose there are really really fancy expensive lenses for 35mm SLRs that you can use to take "true" panoramics (a whole frame tall but wider than a normal frame). Have fun!
|
||||||||||
|
|
|||||||||||
|
John A. Lind |
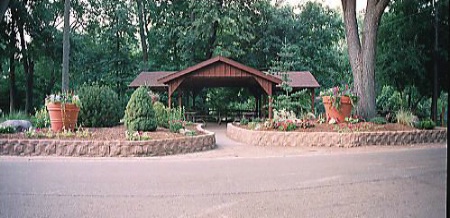
I've also experimented with another method to create "composite" panoramics using a 35mm perspective correcting shift lens. It is shifted completely left for the one end of the photograph and then completely right for the other end. The two images must be "stitched" or spliced together as a composite. Carefully done from a sturdy, rigid tripod they are very precise and line up perfectly! However, they are not as wide as the first method produces. I've posted one of my experimental panoramics using the shift lens method. There's nothing special about the photo; it's purely an experiment with the method. A PC shift lens is very specialized, expensive, about half the cost of the Hasselblad X-Pan. (I use it for a lot of architectural and landscape photography, not panoramics.) "True" panoramics are wider, over 100 degrees, and have a very immersive feeling to them. A true panoramic camera, such as the Hasslblad X-Pan is very expensive ($1700) and will use multiple film frames in a single continuous image. The film must be custom printed by a pro lab that can handle it. -- John
|
||||||||||
|
|
|||||||||||
|
Ed McEwen |
Adobe Photoshop Elements can be used to get the results you are looking for with little effort and the results are quite good. Open Elements, click "File", photomerge, Now you can save for the Web or for Printing. This is a pretty neat and easy to learn option to create panoramics.
|
||||||||||
|
|
|||||||||||
|
John A. Lind |
PhotoShop is one method and from what I've seen done using it, works well. The image posted was stitched together using PhotoVista, which is specialty software specifically for stitching panoramics together. It handles both composites like this one and multiple images from rotational panoramics up to a full 360 degrees. -- John
|
||||||||||
|
|
|||||||||||
|
Tom Darmody |
|
||||||||||
|
|
|||||||||||
| Log in to respond or ask your own question. | |||||||||||