How to Make Your Own Photography Backdrop

by Denise Miotke


Making Your Own Photography Backdrops
Making Backdrops
© Denise Miotke
All Rights Reserved
Buying all the necessary equipment to get started as a photographer, either professionally or just as a serious hobby, is very expensive. So finding a way to save a little money is always of great value.

By making your own photo backdrop, you can both save a little money and express your own creativity.

A creative and professional backdrop can be easily made in a few simple steps.

Needed to Make a Backdrop - The Tools
Backdrop Tools
© Denise Miotke
All Rights Reserved

To make a simple backdrop you will need:

  • About 4-5 yards (12 to 15 feet) of natural or white muslin.
    Buy the widest width you can find.
    (Try to find one that is at least 108 inches.)
  • A roll or two of no-sew fusible tape.
  • An iron and ironing board.
  • A pair of scissors, a pencil, and straight-edge.

  • Color of Photographic Backgrounds - Natural or White
    Natural or White
    © Denise Miotke
    All Rights Reserved

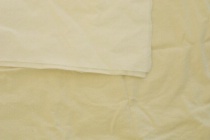
    One of the best materials to make a professional looking backdrop is out of a material called muslin. This is an inexpensive cotton cloth that can be found in almost any fabric store.

    Muslin commonly comes in either white or natural (off-white) and in a variety of widths.

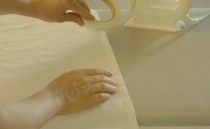
    When you get your fabric home, throw it in the washing machine for a quick wash.
    After drying the fabric, spread it out on the floor and trim up the ends so that they are as straight as possible.


    Measuring for Your Backdrop
    Measure
    © Denise Miotke
    All Rights Reserved
    Use a long straight edge, make a mark with some chalk or a pencil, and then cut the fabric to be as exact as possible.


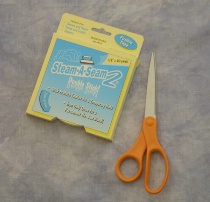
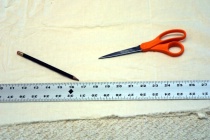
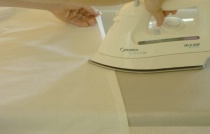
    Now use the double-sided fusible tape and run it along the cut edges.

    Laying Down the Tape
    Laying Down the Tape
    © Denise Miotke
    All Rights Reserved


    Fold the fabric over to create a sharp edge. Following the tape instructions, iron the fabric where you've inserted the tape. Now you've finished your simple, professional backdrop. It's that simple!

    Ironing the Edges of the Backdrop
    Ironing
    © Denise Miotke
    All Rights Reserved

    The tape, once ironed, creates a good bond that requires absolutely no sewing. The backdrop can be gently washed when needed, the the finished edges won't fray.

    If you are handy with the sewing machine and enjoy this type of work, by all means, you can sew a 1/4 or 1/2 inch seam on the ends, instead of the no-sew tape, to finish the back drop.

    If you have a very ample piece of fabric, you can simply toss it over a back drop pole or even tack it up to a wall. If you have a smaller size of fabric, or want a more professional look, there is another step you can add to the process.

    On one of the ends that you've ironed, fold the fabric over another 4 to 5 inches, tack that end down again with the double sided tape, and iron it again. This will create a hole running along the width of the muslin that you can easily fit a backdrop pole through.


    Colorful Backgrounds - Tie Dye Colors
    Tie Dye Colors
    © Denise Miotke
    All Rights Reserved


    Is a natural or white backdrop a little too boring for you? Adding color to your backdrop is easy.

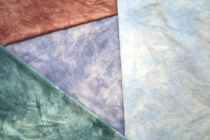
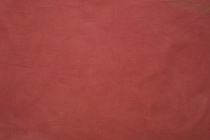
    Back at the fabric store you can find fabric dyes in a multitude of colors.
    I prefer to use the liquid dyes to the powder ones. Powder dyes are more difficult to mix completely and can leave little spots on your fabric.


    Dye and Gloves - Tools for Dying your studio background
    Dye and Gloves
    © Denise Miotke
    All Rights Reserved

    To dye your fabric you will need,

  • a large plastic or metal tub or bucket
  • rubber gloves
  • dye color of your choice
  • hot water
  • Do this process outside or somewhere where it doesn't matter if you spill a little. Dunking such a big piece of fabric usually produces some splashes.

    Follow the dye instructions, add the bottle of dye into the bucket of hot water, and dunk your muslin into the bucket.

    To make sure the color is solid and even throughout the muslin, put on your rubber gloves and swish the fabric around a lot so that every part of it gets well soaked by the dye.

    If you would like to have a slightly mottled, tie-dye effect, scrunch up the fabric and gently submerge it into the solution, without much movement. Either hold it there or gently let go without moving the fabric around much.

    If you pull out the fabric and don't like the mottled effect, simply put it back in the dye and swish it around until all the fabric is infused with the dye. Viola! Your fabric is dyed!


    Solid Color
    Solid Color
    © Denise Miotke
    All Rights Reserved
    When your fabric has the desired amount of color, remove it from the dye solution and rinse it in warm, then cool water.

    A few tips for dying the muslin:

    Before dying the fabric, wash it in the washing machine.

    Don't dry it, but place it pre-wetted in the dye solution.

    After you've dyed and rinsed the fabric, you can send it through the washing machine one more time to get any last residue from the dye out.

    Let the fabric dry on a line, rather than the dryer, for the least amount of shrinkage.

    A final note about muslin is that it looks great either ironed or wrinkled up.

    Making your own backdrop is an inexpensive and quick process, and in no time you have a great addition to your photography equipment. You'll find that the muslin creates a simple, lightweight background good for photographing people or objects without any other distracting elements.

    Enjoy this newest addition to your photography equipment arsenal!

    Other Cool Stuff at BetterPhoto.com!