
Tammy L. Bevins |
|
How to Convert a Digital Image to B&W
What is the best method for converting a digital image to b&w and what process do you use? I have desaturated and then added contrast but I seem to be losing a lot of the gray values. I have seen conversions that look very rich and some even seem warm. Is this due to the lighting in the original shot or is this done in conversion? Thanks
February 22, 2004
|
|
|
Wing Wong |
|
Hi Tammy, Did you use "desaturate" on the image or did you convert to greyscale? I know you said desaturate, but I just have to ask. :) If your copy of photoshop supports 16bit or lab color, try converting to that first, then perform the desaturation. This will help in preventing some loss of range. Once in 16bit mode and having performed the desaturate, try performing an auto-levels to have the range of the image spread out a bit. This will bring out some details and even out the light balance in the picture somewhat. Before running a contrast filter, try adjusting the curves to bring out detail and contrast. This is a manual kind of auto-levels and is a great way of tweaking the shadow and highlight detail of an image. This kind of adjustment is less lossy than using the contrast filter. When you're done, you can re-convert back to 8bit(24bit) mode from 16bit(48bit) mode. As for some shots looking rich, the richness of a BW pic tends, I think, to be determined by the blackness of the blacks and the whiteness of the whites.The quality of the contrast and sharpness of the picture will also contribute to richness. The impression of warmth can also be affected by the amount of "red" which has gotten into the black color. If you are willing, could you post a crop of the before and after pics?
February 22, 2004
|
|
|
Tammy L. Bevins |
|
|
|
|
|
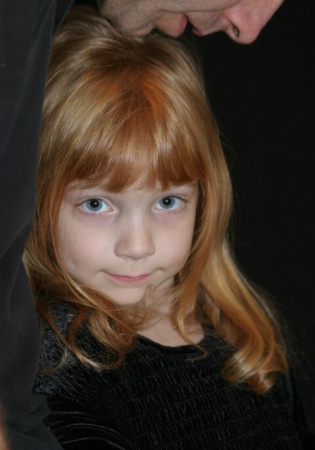
Allison and Dad original image
Tammy L. Bevins
|
|
|
|
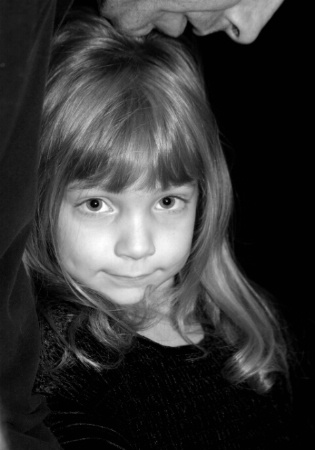
Allison and Dad desaturated and added contras
Tammy L. Bevins
|
|
|
|
Thanks for the help Wing. Yes I was desaturating first. I'm attaching an example of a photo I converted this way.
February 22, 2004
|
|
|
Wing Wong |
|
Hi Tammy, Ah.. I see what you mean. The BW version loses details in the hair highlights, the face, and the sweater. My first impression is that the red channel is getting understated in the final BW image, hence reducing the amount of "detail" in the face and hair where the slight red here and there is visible in the color picture, but not in the bw picture. This can be compensated for with a curves tool to bring out some details instead of using contrast enhancement. I hope you didn't mind my trying a bit. ^_^ I took a crop of the color version and converted to BW with the following method: - Open in color
- Go to color/saturation where it will list various brightness/color hue/saturation sliders.
- select the master and drop the saturation down.
- OK. Then used the color curves tool to adjust the shadow/highlights a bit. The image is basically the same as the one you have posted, but some of the details around the eyes/hair/shirt come out a bit more. Don't know if it is actually better or worse, but I noticed that when I ran a stright desaturation tool against the image, the image lost details because the program was combining color channels according to a different mixing method. The same was true when I tried to auto-levels the image, details got washed out.
February 22, 2004
|
|
|
Tammy L. Bevins |
|
|
|
|
|
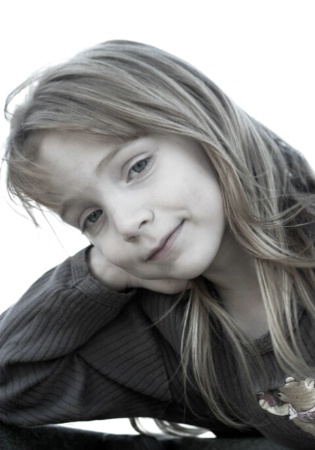
Allison at the Park
Tammy L. Bevins
|
|
|
|
Thanks for the help Wing. I tried your method with another image and I was very pleased with the results. I'm uploading it for you to see. Thanks again.
February 23, 2004
|
|
|
Wing Wong |
|
Hi Tammy, Wow, really nice photo! I can really see more of the details and less loss into shadows. I especially like that there is a hint of pink in her lips. ^_- You have a very photogenic model. Glad to be of help.
February 23, 2004
|
|
|
Sreedevi Kashi |
|
Another way I was taught that may be easier is to convert your file to Lab from RGB. Then you can desaturate, because it deals with each of the tones separately- it's basically exactly what Wing noticed when he just hit desaturate- that it combined all the channels first. After you desaturate in Lab you can covert it back to RGB.
Sreedevi
February 24, 2004
|
|
|
Tammy L. Bevins |
|
|
|
|
|
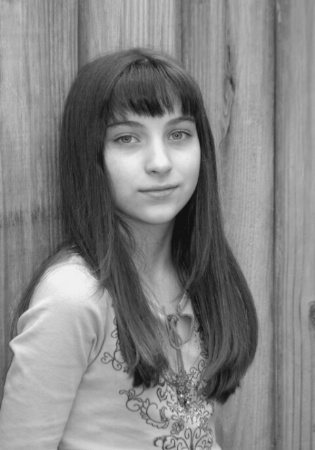
Emma Waiting
Tammy L. Bevins
|
|
|
|
I just found out about a website that gives a procedure for conversion. A man named Russell Preston Brown has come with this one. I found it on his website. He does his by adjustments of sliders made in layers. He makes one duplicate layer in hue and saturation and changes it to color. He makes a second copy which he put the saturation to -100. He then can go to the first copy and make adjustments for each color. The final step is to flatten it. I tried this method and got good results. Here is an example.
February 24, 2004
|
|
|
Jen Hernandez |
|
Here's a great trick:
Choose the channel mixer, turn on the monochrome box at the bottom.
You can now blend the channels using the three sliders, but make sure their percentages add up to a total of no more than 100%.
You can then tweak the overall brightness using the constant slider at the bottom.
This makes it really easy to go back and make changes to the channel mixer at any time.
February 24, 2004
|
|
|
Wing Wong |
|
Interesting methods! *smiles* Thanks for posting them! Definitely good to have more tools to work with!
February 24, 2004
|
|
|
Kip T. Berger |
|
Hi Tammy,
I wanted to play with your post also; I hope you don't mind. I used your color image and used Photo Impact to try to convert your image. I used "Highlights,Midtones & Shadows" to adjust the image. Then destaurated the red channel; then the master channel. Unsharp masked to get this result.
September 20, 2004
|
|
|
Dennis W. Mcclain |
|
i have photoshop, but any program that uses layers would work. what I do it make a copy from background, and do my cahnges on top. if you screw up, de3lete the layer. works great for selective coloring, as u can erase the top layer were u want color and let the color image shinwe through from the bottom
September 30, 2004
|
|
|
|
Log in to respond or ask your own question.
|
