|
Lisa M. McGinnis |
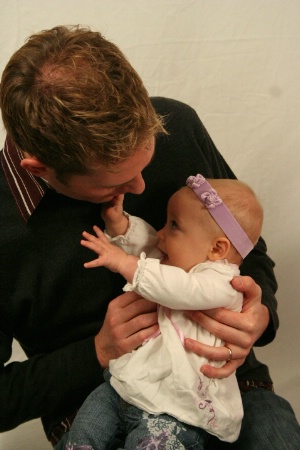
how to use my reflector correctly
i need to know where to place it and where to place the reflecting light source and what type of light to use with what attachment to fill in the face? suggestions please
|
||||||||||||||||||||||||||||
|
|
|||||||||||||||||||||||||||||
|
Pete H |
I'm a tad confused with your posting. It would be very helpful if you could draw a basic diagram of your lighting setup similar to this one. More info would be better such as: Camera to subject distance. Looking at your examples, they appear grossly "under exposed." More info please. all the best, Pete
|
||||||||||||||||||||||||||||
|
|
|||||||||||||||||||||||||||||
|
John H. Siskin |
Hi Lisa, As Pete said, strobes and fluorescent or quartz light will not work well with out filters on the lights. Everything needs to be in the same color pallet. Regarding a light set-up there is not one or two formulas that work for all circumstances. The idea is to learn what the lights actually do and then apply that to the shot you want to make. The idea is that you are making a photograph, not taking a photograph. You will need some practice. I would start working with one light so that you can get a feel for how that functions. You might want to check out this article: www.betterphoto.com/article.php?id=129. Thanks, John Siskin
|
||||||||||||||||||||||||||||
|
|
|||||||||||||||||||||||||||||
|
W. |
"everything is evenly lit but struggling with it being too flat... and I am using my external flash to set the strobe off" Hi Lisa, I'm guessing your lighting is flat because your on-camera flash is flattening the light. Have fun!
|
||||||||||||||||||||||||||||
|
|
|||||||||||||||||||||||||||||
|
Pete H |
Lisa, Using the on camera flash is a perfectly acceptable technique to trigger other strobes. The modern day on board camera flash can be "dialed down" so that it puts out very little light, thereby NOT contributing to the overall image in any significant way. This is actually the preferred method for myself as I eliminate cords all over the floor. TIP: Cover the camera flash with a piece of aluminum foil so the flash can not fire any light forward. The foil should be manipulated so it triggers only one of your strobes (usually the closest to your camera)..The rest will trigger off the closest strobe.
Pete
|
||||||||||||||||||||||||||||
|
|
|||||||||||||||||||||||||||||
|
W. |
"The modern day on board camera flash can be 'dialed down' so that it puts out very little light, thereby NOT contributing to the overall image in any significant way." Unless there is/are (a) shiny object(s) in the image! Because then the on-board flash will reflect in it. The even more "modern day on board camera flash" is switched to infra-red light to be even less visible.
|
||||||||||||||||||||||||||||
|
|
|||||||||||||||||||||||||||||
|
Pete H |
W, Read my last post. Read the "tip." A reduced output from the on board flash will NOT cause red eye..not enough light to cause pupil reaction.
|
||||||||||||||||||||||||||||
|
|
|||||||||||||||||||||||||||||
|
Alan N. Marcus |
Hi Lisa, Placing the lights: Do not mix constant lights with electronic flash (black & white is an exception). Start with your three constant light set only. First photography is an art form; you are free to follow your heart. However there are tried and tested conventions. Most portraits look best if you can create the illusion that only one light was used. First start with placement of the MAIN light sometimes called the KEY light. Start by placing it high to simulate afternoon sun. Placement of the MAIN is what this is all about. Start with this lamp off to the side, about 45° from the camera-subject axis. Experiment by moving it about i.e. more frontal – more to the side, always high. Hollywood creates monsters by placing the MAIN low. Next time you see a horror flick, check this out. Using one lamp usually produces harsh shadows. This will be too contrasty. We must somehow soften the shadows. This is the job of the FILL. To maintain the concept of one light, a FILL is used and adjusted subordinate to the MAIN. Start with the FILL light arriving at the subject 50% (1 f/stop) weaker. Accomplished by placing the FILL more distant. FILL placement distance is a math problem. Measure MAIN-to-subject distance and multiply by 1.4 this math makes known the greater FILL-to-subject distance. This math also fulfills the 50% reduction in light energy (assumes MAIN and FILL are equal in wattage). This placement establishes what is called the “bread-and-butter” lighting ratio of 3:1, generally agreed to be ideal. The position of the FILL is at lens height as close to the subject-camera axis line as possible. OK to stray off this line to avert the FILL from getting in the way. We want to fill shadows cast by the MAIN from the camera’s viewpoint thus its location is on or near the camera-subject axis. If the FILL position is rigid, measure FILL-to-subject distance and multiply by 0.7. This is alternate math to establish MAIN-to-subject distance. Once you master basic lighting, experiment by moving the fill further back. Each move yields more contrast. The increment of the movement is again the 1.4 multiplier. You can do this twice. The sequence produces will be lighting ratios 5:1 somewhat contrasty – 9:1 the last one and most contrasty i.e. theatrical lighting. Can’t go higher as the next increment is black no-detail shadows. The third lamp is the BACKGROUND. Place hidden behind the subject pointing at the background. Distance lamp-to-background establishes background brightness. Start by measuring MAIN-to-subject distance and multiply by 0.5 to calculate a trial BACKGROUN-to-lamp distance. Play with BACKGROUND-to-lamp distances to see the effect. Exposure: Will all lamps off except FILL, determine with the camera’s metering system, what the shutter speed and aperture setting it suggests. Now centered around that aperture shoot a series at 1/f-stop increments. Hope this helps I often dispense marginal technical gobbledygook. Alan Marcus, Anaheim, CA
|
||||||||||||||||||||||||||||
|
|
|||||||||||||||||||||||||||||
|
This old forum is now archived. Use improved Forum here
Report this Thread |
|||||||||||||||||||||||||||||