|
Sara H. Robinson |
Silhouettes I have tried to take a picture that is silhouetted against the sunset, but I could not do it. Help please, tell me how it is done.
|
|||||||||||||||||||
|
|
||||||||||||||||||||
|
Rebecca A. Steed |
What type of camera are you using? When composing the picture, first take your meter reading from the sky. If the sun is part of the composition, I recommend metering to the side of the sun. don't meter with the sun in view. then compose your picture. this should cause your subject to be completely black and the sunset a beautiful color. hope this helps.
|
|||||||||||||||||||
|
|
||||||||||||||||||||
|
John Rhodes |
Sara, I just looked through your galery and found you have already taken a silhouette photo--sunrise. When you took this photo, I suspect you metered off the sky as Becky said. If you set the exposure off the bright part of the scene, the darker parts will be underexposed or entirely black. John
|
|||||||||||||||||||
|
|
||||||||||||||||||||
|
Denyse Clark |
I didn't really understand metering until I took Jim Z's "mastering light" class. Use Av mode, open your apeture to a wide number, I think I used 5.6 on this pic. Focus in on the sky (not the actual sun like Becky said), press your shutter 1/2 way. Note the shutter speed the camera tells you. Now, go to M mode and set your aperture & shutter speed to what you just metered, compose your pic & take it. Your camera sensor will probably be yelling at you that's it's an incorrect exposure- ignore it! I also learned WHY you have to open the aperature so wide when you have a round object- if you go smaller (bigger f number), any "highlight" (the sun in this case) will no longer be round, it'll be a hexagon!! Hope this helps!
|
|||||||||||||||||||
|
|
||||||||||||||||||||
|
Denyse Clark |
|
|||||||||||||||||||
|
|
||||||||||||||||||||
|
Bob Cammarata |
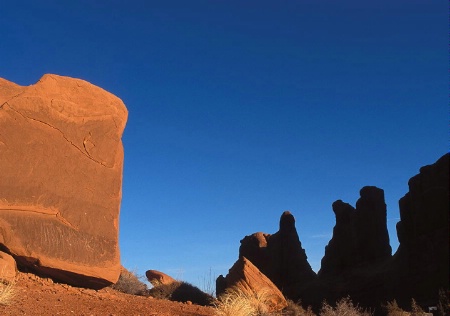
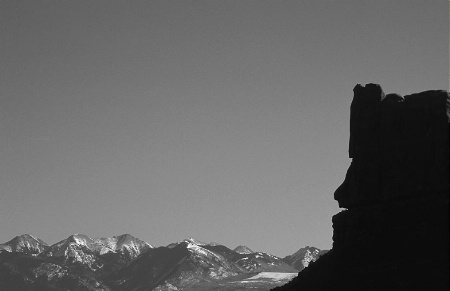
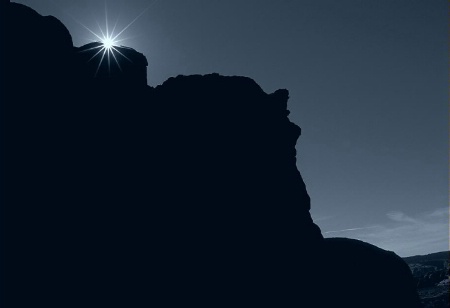
*Keep the primary light source in front of you, but behind your point of interest...(that which you want to silhouette). *Meter the bright background as described. Definately exclude the sun when metering. Try to spot-meter a portion of a deep blue sky and shoot at that setting for best results. *When using a digital camera (or slide film), make sure that there are at least 3 to 4 stops difference between your metered setting and the foreground you want to silhouette. The greater the difference,...the darker the silhouette will appear. *Avoid shooting directly into a bright, un-diffused sun to eliminate lens flare and those pesky un-natural looking "halos" which often appear around a bright light source. *Definate bracket when using film. It's wise to shoot at several different exposure settings with digital also,...(less fixing). The attached examples were shot just recently using these techniques. Bob
|
|||||||||||||||||||
|
|
||||||||||||||||||||
|
This old forum is now archived. Use improved Forum here
Report this Thread |
||||||||||||||||||||